The Events section allows custom events to be manually created along with the set of events drawn in from third party resources through the iCAL format. The calendar data transmitted via iCAL format can have a single event entry or many event entries depending on the type of feed. The Events section helps you to create custom events and view the iCAL feeds that are registered with the VOGO Voice platform.
This user centric guide outlines in multiple steps the exact methods adopted to create, edit and delete custom events integrated on the database of the skill along with assigning Events category which will give filtered results for the users based on their areas of interest. Subsequently you will be introduced to the guidelines to test and validate how successful you were in creating a custom event to be accessed through the skill upon the user’s request.
Let’s get you started.
Prerequisites:
- VOGO Voice account: https://www.vogovoice.com/
- Access rights to the Events section on home page
- Details of the event item to be created.
How to create a custom event
Indexing an iCAL feed into VOGO Voice platform will generate a list of individual events drawn in by the feed in the Events section. Along with this, you have the ability to create manual events with desired voice and display message to apprise the users of the event updates.
Now you are going to learn how to create a custom event to be accessed through the skill
- Log into your VOGO Voice account to be directed to VOGO Voice Management Console (https://account.vogovoice.com)
- Navigate to the Events tab on the vertical bar displayed on the left hand side of the home page.
Home > Event
3. Click on the create Event Button on the bottom right hand corner of the screen.

4. New Event pop up window will appear which prompts the user to populate the fields.
Defining field values
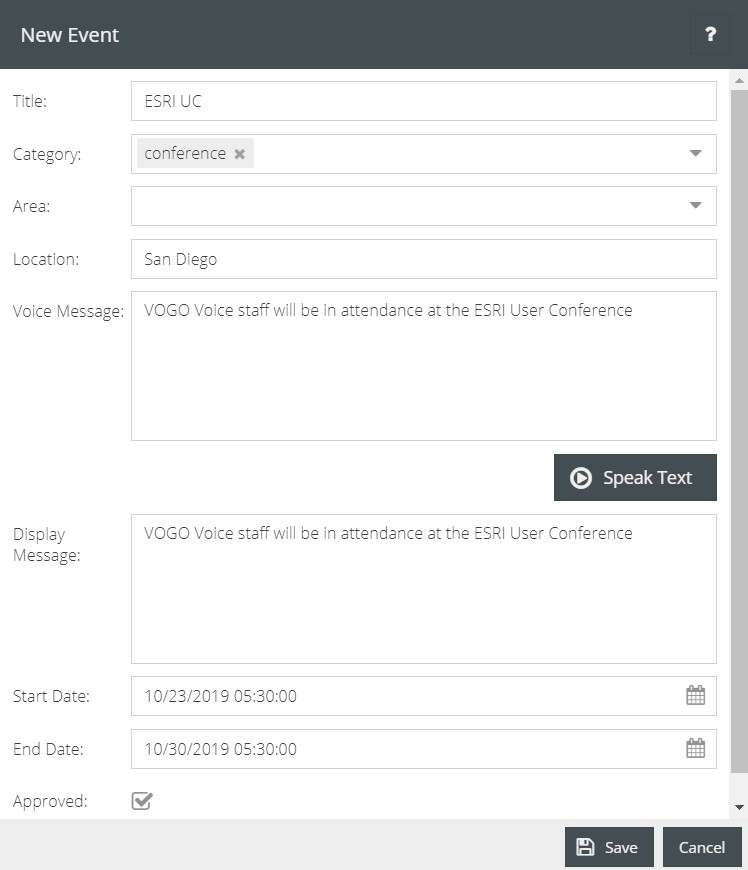
- Title: Type in the title you have decided to assign to the custom event.
- Category: Click on the drop down list and select the Category that has to be assigned to the event item. The list has predefined slot values assigned within the slot type EVENT_CATEGORY. Any new slot values assigned will also be a part of this drop down list.
- Location: Enter the location of the event. The event venue can be a specific building like “Downtown Performing Arts Theater” or as detailed as a street address.
- Voice Message: Enter the voice message that will be spoken when the new article is given.
- Speak Test button: It will help you test how the defined voice message will sound through the device.
- Display Message: Type in the preferred display message to be set up on the video enabled voice assisted device.
- Start Date and End Date: These date fields help you define the time range for an event. Clicking on the calendar icon in either of the date fields will pop up a date picker to choose the start date and end date which determine the period for which the details of the event can be accessed by the user from the database of the skill. You also have the provision to enter the date and time manually if required.
🖍 Note: If the input time range given by the user intersects with the start date and end date defined for an event, the user will receive these events as results. - Approved: Click the box for an event to be enabled and returned for questions. The details of an event pending approval cannot be fetched via the custom skill.
5. Click the Save button after filling in the fields.
👍Note: When multiple categories are displayed for a single event pulled in through the iCAL feed, some of them may be highlighted in red. This indicates that the category has not been trained in the custom skill. Clicking the “+” on the related category will add this category to the EVENT_CATEGORY slot, thereby allowing the users to use that category as a filter when retrieving events. This “+” button serves as a shortcut to assign slot values in the slot type EVENT_CATEGORY from the Events section.
Testing and Validation
To test and validate the process
- Navigate to the Events section on the homepage.
- You will be able to see the custom event listed in the Events section.
If so, you have successfully registered the custom event with the platform for the event details to be accessed through the skill.
To vocally test the process through the device you can use any of the below mentioned sample utterances: What events are happening {Date}? What {Category} events are happening in {Date}? To access more sample utterances falling under the built-in Events intent, Navigate to Settings> Intents> Events> Sample Utterances.
Editing a custom event
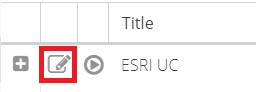
The Edit symbol is active only for custom events and not for the integrated events on the skill from third party sources. Hence, only manually created events are editable.
To edit the specifications of an event,
- Click on the Edit symbol on the left of the title assigned to the event.
2. Edit the desired fields in the Edit Event pop up screen that appears.
3. Click the Save button to save the changes.
Deleting a custom event
The manual action of deleting a manual event item is performed by following the simple procedure:
- Click on the Edit symbol on the left of the title assigned to the event.
- Tap the Delete button on the bottom left-hand side of the Edit Event pop-up screen.

This will delete the event entirely and will not be present in any future responses when event questions are asked.
- To know about Events section, click here.