The VOGO Voice platform supports Alexa/Google Assistant to send notifications in the form of voice messages through the custom skill to alert its subscribers of new content. When a customized notification message is delivered, the end-user who has enabled notification on his device will receive an audio alert upon which he can ask for message updates.
This user-centric guide focuses on how the VOGO Voice platform helps to create domain-specific channels to push notifications to its subscribers. It presents a comprehensive overview of the procedure adopted to define the customized message to be delivered through the channel along with setting an expiry date if required.
Let’s get you started.
Prerequisites:
- VOGO Voice account: https://www.vogovoice.com/
- Access rights to the Notifications and Topics section
How to create a Topic to send notifications
Here’s the listing of steps to create a channel by adding a new Topic to enable sending notification messages through the custom skill.
- Log into your VOGO Voice account to be directed to VOGO Voice Management Console (https://account.vogovoice.com)
- Navigate to the Notification Topics on the vertical bar displayed on the left-hand side of the Dashboard.
Dashboard > Notification Topics - Click on the create Topic Button on the bottom right-hand corner of the screen.

4. Add Topic pop-up window appears prompting the user to populate the fields.
Defining the field values
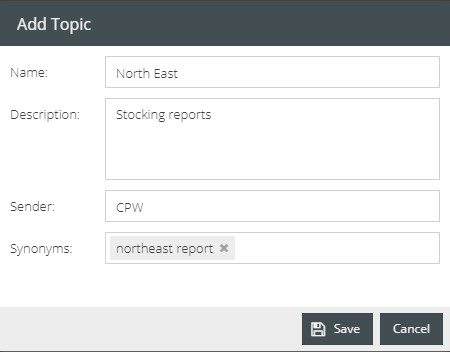
Name: Assign a suitable name to the Topic adhering to the content of the notifications to be pushed through the newly created channel. This phrase is also what is used to “register to {name}” so be concise of the name chosen since it is more than just a visual display of the topic.
Description: Add an appropriate description as a reference to the topic/channel to identify the core matter it intends to notify the end-users via voice messages. This is also used when someone asks about available topics they can sign up for.
Sender: The field gets automatically populated with the name of the custom skill that initiates push notification. The Sender denotes the skill on behalf of which the notification is issued and the name can be edited by the Skill designer if required. It is spoken when someone asks about their messages and provides context to the topic and sender since many messages could be available from other skills installed on the account.
Synonyms: This field allows the provision to add synonyms to the predefined slot values in the global slot titled TOPIC_TYPE. These synonyms act as a reference for the name when someone may want to sign up for the notifications using a synonym vs the actual topic name.
🖍 Note: Ensure to press comma (,) after typing every synonym for it to be indexed as a value.
5. Click the Save button after filling in the required fields.
Once a new topic is added, it will be displayed on the Notification Topics screen. Each item denotes a channel listing the name of the topic, description, sender who initiated the notification, the date on which the topic was created along with the number of subscribers who have registered with the topic.

👍 Note: General is a default topic common for all skills which cannot be deleted. Being a general channel, any notification message pushed through the channel would be sent to all the users who have enabled notifications on their device.
How to send a notification message
Now that you have added a Topic, let’s take a detailed look at the steps to create a notification message to be delivered through a specific channel.
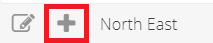
- Click the + button on the left of the Topic name to be directed to the Notification pop-up window.
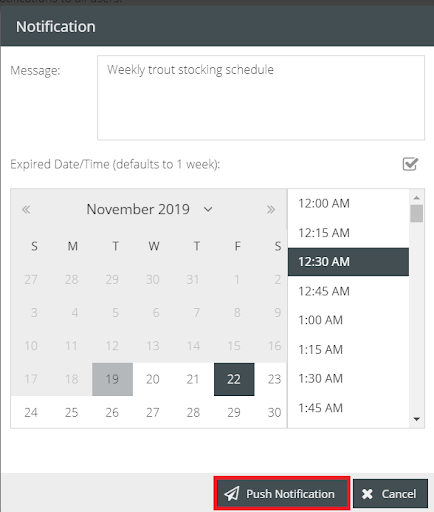
2. In the field titled Message, type in the desired notification to be delivered as a voice message through the device.
3. To set an expiration datefor the notification message, check the checkmark box against Expired Date/Time.
1. This enables the Skill designer to pick an expiration date and time for the defined notification message. If not selected, it defaults to 1 week. Most cases where you would want to use this feature is when the information is not valid anymore. Ie. Don’t forget about the event this Friday so having it go beyond Friday may not be of value to the skill user.
4. On completing the requirements click Push Notification for all the users who have registered to the topic to be notified of having a voice message from the enabled skill.
👍 Note: Currently the platform does not support scheduling a notification message to be sent as a future post.
Clicking the individual records listed for each Topic will display the details of the notification message on the bottom half of the screen. To know more in detail visit https://university.vogovoice.com/kb/notification-topics